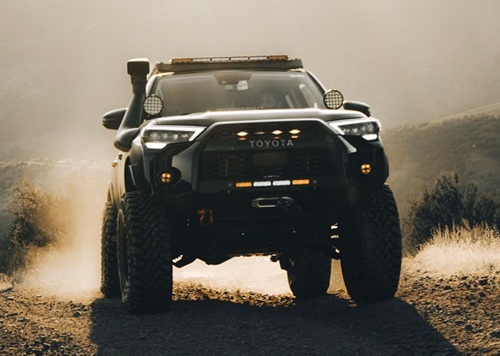
Preparing a vehicle for demanding off-road greenlaning, touring, or trial competitions requires moving beyond standard factory specifications. While stock suspension setups are engineered for smooth motorway cruising and everyday urban commuting, their limits are quickly revealed when subjected to rutted tracks, deep mud, and rocky terrain. Upgrading to heavy-duty custom fabrication parts—such as heavy-duty control arms, panhard rods, shock mounts, and gusseted axle housings—is the primary method for improving ground clearance, suspension travel, and long-term durability.
Upgrading off-road hardware requires careful planning to maintain vehicle stability, steering geometry, and structural integrity. Technical specs, fabrication standards, and component tolerances from specialized workshops such as FRDM Fabs are often examined by enthusiasts and builders to better understand how custom mounting brackets and reinforced suspension arms handle extreme stress under heavy loads. Understanding how to select, inspect, and install these heavy-duty components correctly helps ensure your vehicle remains safe and reliable on both public highways and remote trails.
1. Key Considerations When Selecting Custom Fabrication Components
How dynamic forces transfer through your vehicle’s chassis is changed by installing aftermarket suspension components. Premature component failure or poor handling is often caused by selecting parts based solely on appearance or lifted height.
Assessing Material Quality and Fabrication Methods
Constant twisting, compression, and impact forces are endured by off-road suspension links and mounting points. Look for components manufactured from high-grade structural steel tubing, such as Cold Drawn Seamless (CDS) or Chromoly (4130) alloy tubing.
- Seamless vs. Welded Tubing: Uniform wall strength is offered by seamless tubing, which reduces the risk of splitting under heavy torsional loads compared to standard welded tubing.
- Weld Integrity: Clean, consistent TIG or MIG welds should be looked for when inspecting gussets and brackets. Stress risers that fracture under repetitive impacts are created by poor weld penetration.
- Protective Coatings: Rapid corrosion of exposed raw steel happens under typical British weather conditions. Ensuring parts feature durable powder coating or electrocoating is necessary to prevent rust formation around joint threads and mounting bolt holes.
Bushings and Joint Selection
Both articulation and ride comfort are determined by the connection points between your suspension links and chassis. Road vibrations are absorbed effectively by rubber bushings, but quick wear occurs when they are twisted beyond factory angles. Greater resistance to oil and weathering is offered by polyurethane bushings while reducing chassis flex, which makes them ideal for lifted greenlaning vehicles. For maximum articulation, unhindered movement is provided by spherical heim joints (rose joints), though more frequent cleaning and maintenance are required to prevent grit abrasion.
2. Inspecting Off-Road Hardware Before Installation
Prior to installation, even high-end custom components must be thoroughly inspected. Assembly delays are prevented and related driveline components are protected from misalignment by pre-fit quality checks.
Checking Dimensions and Thread Pitch
Before fitting adjustable links, measure their overall center-to-center length. To verify that internal threads are free from metal shavings, powder coat overspray, or burrs, thread turnbuckles and rod ends completely into their sleeves by hand. Thread engagement is critical: equal to or greater than the outer diameter of the threaded shank must be the length of thread engaged inside the sleeve, as a general rule.
Evaluating Bracket Tolerances
Against the vehicle chassis, hold replacement mounting brackets and axle gussets to check hole alignment. Snugly around Grade 8.8 or Grade 10.9 high-tensile hardware should mounting bolt holes fit. Shifting of hardware under heavy braking or acceleration is allowed by oversized or slotted holes, causing clunking noises and accelerating bracket wear.
3. Step-by-Step Fitting and Alignment Guidelines
To preserve correct steering geometry and prevent binding across the full range of wheel travel, a methodical approach is required when installing custom suspension hardware.
Step 1: Secure the Vehicle and Support the Axle
On a level concrete surface, park the vehicle, engage the handbrake, and place wheel chocks around the tires staying on the ground. Using a rated hydraulic jack, raise the vehicle and support the frame securely on heavy-duty axle stands. Under the axle assembly, place a secondary jack to control its height independently during component removal.
Step 2: Remove Old Hardware and Prepare Mounting Surfaces
Original control arms, panhard rods, or sway bar links must be unbolted. To remove rust, road grime, and old grease, wire-brush all chassis mounting pockets. Original chassis bracket holes should be inspected for ovaling or stress cracks. If chassis brackets are worn, repair or reinforcement must be done before installing new components.
Step 3: Test Fit without Springs or Shock Absorbers
To confirm that custom links do not bind or strike the chassis, coil springs should be temporarily removed or air suspension cycled to its lowest setting. Through its full range of movement, raise and lower the axle while turning the steering wheel from lock to lock. Adequate clearance should be verified around:
- Brake hoses and ABS sensor wires
- Propshaft universal joints and slip yokes
- Steering linkages and exhaust piping
Step 4: Torquing Fasteners at Operating Ride Height
While the vehicle is suspended on axle stands with the wheels hanging free, suspension pivot bolts should never be fully tightened. Permanent twisting of the rubber or polyurethane is caused when bushings are tightened in an unloaded state once the vehicle sits on its tires, leading to premature bushing failure. Lower the vehicle onto its wheels, settle the suspension by bouncing the bumpers, and torque all hardware to manufacturer specification using a calibrated torque wrench.
4. Post-Installation Alignment and Trail Maintenance
Caster angles, camber settings, and tracking are altered by modifying suspension height. Safe highway driving makes correcting these parameters immediately after installation essential.
Steering Alignment and Caster Correction
Forward rotation of the axle housing is caused by lifting a solid-axle vehicle, which reduces the positive caster angle. Light steering feel and wandering at highway speeds are caused by low caster, failing to return to center naturally after turning. Correct caster geometry is restored by adjustable control arms or drop brackets, ensuring predictable handling on public roads.
Ongoing Inspections After Trail Use
Severe stress is placed on hardware by off-road conditions. Following every trail outing, a post-drive maintenance routine should be established:
- Fastener Checks: After the first 100 miles of road use and after every off-road trip, re-torque all suspension bolts, locknuts, and jam nuts.
- Lubrication: With fresh water-resistant synthetic grease, flush greaseable rod ends and polyurethane bushings to push out ingress mud and grit.
- Corrosion Touch-ups: Trailing arms and skid plates should be inspected for rock scrapes. Damaged areas must be cleaned and touch-up paint applied to prevent rust spots.
Pre-Departure Suspension Safety Checklist
Before setting off on any extended journey or off-road drive, run through this quick inspection protocol:
- Hardware Torque: Verified that all jam nuts, suspension bolts, and steering joints are torqued to specification.
- Fluid Clearances: Checked brake lines and wiring harnesses for chafing against moving suspension arms.
- Joint Condition: Confirmed that rose joints and polyurethane bushings show no excessive play or splitting.
- Axle Alignment: Ensured that axles are centered under the chassis using adjustable panhard rods.
- Tire Clearance: Verified full wheel articulation without bodywork rubbing at maximum steering lock.
Optimum performance, durability, and safety across challenging terrain are delivered by your custom off-road suspension when these practical sourcing, installation, and inspection practices are followed.
